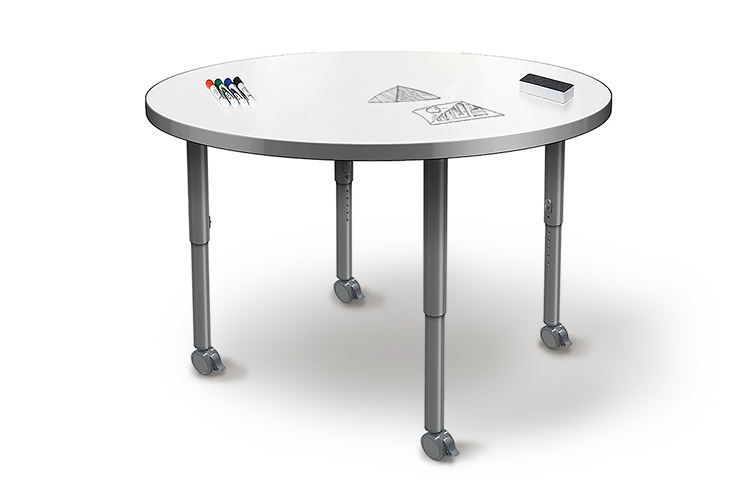
Dry Erase Markerboard tables are more than just school furniture; they’re dynamic hubs for creativity, collaboration, and productivity. Whether you’re brainstorming in a bustling office, teaching an engaging lesson, or simply keeping your family organized at home, your dry erase table plays a vital role. But just like any valuable tool, it needs proper care to stay in top condition.
This comprehensive guide will equip you with the knowledge and techniques to keep your Allied Dry Erase Markerboard Tables looking pristine and performing flawlessly for years to come.

Understanding Your Dry Erase Surface
Allied Whiteboard Top Tables boast a durable, high-gloss surface designed to withstand the rigors of daily use. This high-pressure laminate is built to last, but it’s not invincible. To preserve its pristine appearance and functionality, it’s essential to understand a few key points:
- Sensitivity to Harsh Treatment: Avoid using abrasive cleaners, scouring pads, or harsh chemicals on the surface. These can cause unsightly scratches and dull the finish. Similarly, sharp objects like writing utensils or tools can easily damage the laminate.
- The Enemy of Ink Build-up: While dry erase markers are designed for easy removal, leaving ink on the surface for extended periods can lead to staining and “ghosting” – those faint remnants of previous markings that refuse to disappear completely.
Everyday Cleaning: A Simple Routine
Maintaining the beauty of your dry erase table doesn’t require a complicated regimen. A simple daily cleaning routine will go a long way:
- Wipe Down: After each use, wipe the entire surface with a soft cloth moistened with warm water.
- Dry Thoroughly: Immediately dry the surface with a separate, clean, soft cloth. This prevents water spots and ensures a streak-free finish.
- Weekly Cleaning: For a deeper clean, use a markerboard top cleaner once a week. Apply it to a soft cloth and wipe the entire surface, then dry thoroughly.
Troubleshooting and Advanced Cleaning Techniques
Even with diligent care, you might encounter some common issues. Here’s how to tackle them effectively:
- Ghosting: If you notice faint marks that won’t erase, try this trick: color over the area with a dry erase marker, and then erase. The solvent in the fresh ink can help dissolve the stubborn residue.
- Accidental Permanent Marker: Don’t panic! In many cases, you can remove permanent marker by coloring over it with a dry erase marker and then erasing.
- Stubborn Stains: For particularly difficult stains, consider using a specialized markerboard cleaner. Always apply the cleaner to your eraser or cloth, not directly to the table surface.
Choosing the Right Tools
The tools you use play a crucial role in keeping your dry erase table in pristine condition. Here are some key considerations:
- Erasers: Opt for erasers specifically designed for markerboards. Mr. Clean Magic Erasers are known for their effectiveness. Avoid regular erasers, as they may not erase cleanly and could even damage the surface. A soft, clean cloth like a white t-shirt is a great alternative. If you prefer microfiber, ensure it’s rated for optical use, as some types can be too abrasive.
- Cleaning Solutions: When selecting a cleaner, look for those specifically formulated for markerboards. Here are a few popular and effective options:
- Expo Dry Erase Board Cleaner
- Quartet BoardGear Markerboard Cleaner
- Best Rite Green Erase Cleaner
- Staples Sustainable Earth Multi Whiteboard Cleaner
- Mar-Kleen Dry Erase Markerboard Cleaner
- LCS Whiteboard Cleaner1
A Final Word
By following these simple guidelines and incorporating regular cleaning into your routine, you can ensure your Allied Whiteboard School Table remains a valuable asset for years to come. Treat it with care, and it will reward you with a pristine surface that inspires creativity and enhances productivity.


